Monday, March 28, 2016

Wood box with dollar store frame

My spare bedroom has slowly become a dumping ground for all my future "projects".  There's an assorted collection of picture frames, fabric, cabinet doors, several pieces of scrolly iron things and a clock that I want to "do over".  It's getting pretty scary in there.

Before  I hit another thrift store and bring home other people's stuff to work on, it's time to focus on the pile of things I already have.   And with family coming out this summer to visit, it's time to start making a dent in that pile and reclaim my guest room.


Out of the pile came a wood box that I've had for 2 years.  Probably longer.  Got it from a garage sale.   It sat on top of my kitchen cabinet filled with boxwood that I cut from an overgrown shrub.  When the boxwood shriveled up and died, I took the box down.   The plan was to give it a new look, cause it looked too plain,,  Just blah.   

 No "before" picture.  Sorry.  I was putting on the second coat of paint before I realized that I didn't take a picture.  It had a bronze spray paint on it...like someone wanted it look like metal instead of wood.   


I had some oops paint in a pretty periwinkle blue color that I had been dying to try.    Here is is after 2 coats.


And of course, it got a good sanding down for a distressed look.   Cause everything has to look old and scuffed up.


I got this frame from Dollar Tree.   It's super thin and light, but I liked the detail.  This was going to get painted the same color and put on the box.


I have no idea what these are called.   I found them when I was walking around Lowes.  They were in the plumbing section.  These are 2" size.  Well, whatever they are, they are now my handles.

  This is what they look like after soaking 24 hours in a bleach/vinegar mix.


I took the backing off the frame and pulled off the tabs with pliers.   Since I was going to glue it directly on the box, I needed it to lay flat.  


Next, 2 coats of the same periwinkle blue.   What I SHOULD have done was make my own chalk paint for the frame instead of plain latex. The latex was okay, but CP would have been better.  Live and learn, right?


I very, very gently sanded around the frame.  I didn't want "shiny" to come through.   A watered down brown craft paint was brushed on and wiped off to age the blue paint.  The idea was to match the frame to the box.


Now time to make a chalk board.  I removed the cardboard that was inside the frame and traced it on foamboard (also from Dollar Tree) and cut out.  This will be the chalkboard.   The cardboard that came with the frame had small holes in it, so I couldn't use it.


I gave the foamboard 2 coats of chalkboard spray paint.  As soon as it was dry, I rubbed a piece of chalk sideways all over.  Wipe on, wipe off.  I did this a couple of times, because the foamboard has little dips in it.   After the third time, it really started to look like chalkboard.     Normally, you're supposed to wait longer than that before you put chalk to it, but I'm impatient that way.  And this isn't chalkboard that anyone will write on anyway.


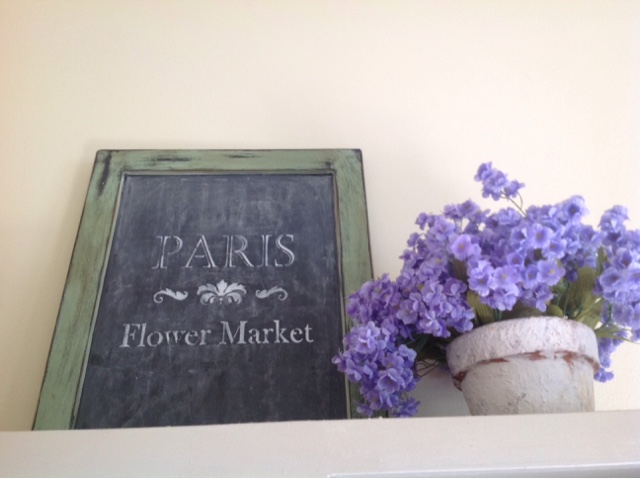
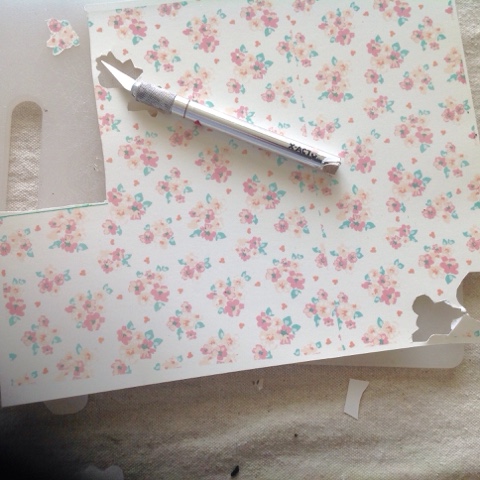
I placed a graphic with little clippies and traced with a stylus.   Since this is foamboard, it left an indentation which made it easy to fill in with paint.


When that was drying, I attached my handles.

Now I can glue the frame to the box.   The foamboard fit in the frame perfectly.    It was pretty thin.   I think the kind that Michaels carry would be too thick to fit inside this wimpy frame.

I really like how this turned out.   Best of all is that there is one less thing in my pile.   


I'm on my way to getting my guest bedroom back.


Thursday, March 24, 2016

Flower pot makeovers

I have an abundance of terra cotta flower pots that I've collected over the years.   I seem to gravitate towards them like moths to a flame.  It seems I can't have too many clay pots.   I like to change the look of them to add some interest.  


Over the years, I've spray painted countless numbers of less than perfect pots from yard sales.  On others I slapped on joint compound for more dimension.  Today I experimented with simple brown paper bags.

I started out with this painted pot.


I tore large pieces of a lunch sized brown paper bag and glued down with modge podge.  When dry, I pressed down with some rubber stamps.   And rubbed a stamp pad here and there over the creases.   Easy peasy.


Since this next pot was narrow, I  slipped it into the bag and folded down the edges.


I rubbed a little modge podge in the center and pressed a torn book page.  Then wrapped around a thin cotton strip it and finished with a fabric flower.


Or sometimes a pretty gift bag makes a nice container.   I glued a floral foam block to the bottom of the inside of the bag to hold the flowers upright.


I love decorating with flowers.  


Saturday, March 19, 2016

Fun things to do with kitchen cabinet doors

Cabinet doors are one of those things that can set my heart racing.  I was lucky enough to find a pile of these at a thrift store.  They were in excellent condition and at $2.50 each, I knew I scored big time!  I had to restrain myself from buying all of them.  


   So I packed 6 of these in my car and was already dreaming of  the possibilities :)


First on my wish list is a chalkboard for my kitchen.   

The inside "panel" was going to be the chalkboard.  As an experiment , I thought I would see how the Rustoleum Chalkboard Spray would hold up without sanding the wood first.   Chalk board and chalk paint seem to have the same texture and the less sanding I do, the happier I am, so I thought I'd give it a whirl.


It seems that you do need to sand, only if you're going to write on your chalkboard.   The chalk pulled off the paint when I tried to write.    So, If you're not going to write on the chalkboard , don't bother sanding.  The Rustoleum covered beautifully in one coat.


Now for the "frame". 


After taking off the hinges with a screwdriver, it was time to beat up the wood a bit.   A few swats with a hammer and screwdriver should do it.  Then a good sanding down with a 220 grit to remove the glossiness.  Total time about 5 minutes.


For this I am using  Miss Mustard Seed Milk paint in Lucketts Green.  I don't use milk paint that often, but thank goodness she does a demo on You Tube.   That's was really helpful to watch.   Since I was standing over the cabinet to paint,  I put some card stock over my chalkboard to protect it from getting any paint splatters.   Milk paint is very thin.


I applied 2 coats of the green and dried with a hair dryer cause I'm impatient that way.   Milk paint is supposed to "chip", but I didn't have any chipping going on.   Maybe because my bag of milk paint is about 4 years old ( I told you I don't use milk paint often) or maybe it was the wood itself.  No big deal .  It sanded beautifully on the edges and wherever I want a distressed look.  

 Then  a light seal of light wax followed by dark wax.


Since I wasn't going to use chalk, I decided on a stencil.    I used MS chalk paint in Wedding Cake, which is a very white white.  I like to use the little foam, triangular shape makeup sponges from the dollar store for stencilling.


I gently pressed down with the sponge , inside of wiping across the stencil.    I was afraid I would wipe off the chalkboard.


So right now, my chalkboard sits on top of my kitchen cabinet.   I bought some different flowers that I like better  and I got a basket instead of a flower pot, but for now, those can stay up there. 


The picture aren't the greatest I know....I take my pictures with my IPad.   Hopefully soon, I will get a decent camera and take better photos.   I m trying to find out which would be a good camera to get.  

But until then.....


Thursday, March 17, 2016

Ceramic chicken spray painted

I love the farmhouse style and thanks to Pinterest, I have a good idea what items scream farmhouse.  It seems no kitchen is complete without a white ceramic chicken.    So when I found this colorful little chicken in a thrift store, I knew he was coming home with me.


All he needed was a coat of white gloss spray paint.     


 I am on babysitting duty this afternoon for my grandson, so this was the perfect makeover to do.  Less than one hour. :).  


 When you shop in a thrift store or yard sale, try to look past the color you are seeing.  Color is the easiest thing to change.  Focus on things like the shape and overall condition of an item.


My little chicken now lives in my china hutch.  


   Time to take my Beleek out for St. Patrick's Day.

Saturday, March 12, 2016

Painted doll crib with waterside decals

My 20 month old granddaughter, Avenley is really into dolls.  She just loves her babies.  So when she comes and visits grandma, it's important that I have a bed for her babies to sleep in.

I found this little wood crib when I was browsing at the thrift shop recently.  


It was a little rough around the edges.   And it had some dried paint blobs here and there.


So with my sander, I got to work and smoothed out all the edges and the wood "pokies".   I don't want little fingers to get splinters.


Not pretty at this stage, but smooth as a baby's bottom.   Next, a coat of white primer. 


I had some leftover pale pink latex paint that we used when we redid my daughters room.  It is a beautiful, blush pink and not a color she would normally choose.   At 15 years old, she is more into lime green and teal colors.  But she fell in love with a gray and pink bedroom she saw on Pinterest and I love how her bedroom came out.  Luckily, I had lots of pink paint left over.


I wanted small little rosebuds decals placed on the front of the crib to make it seem more vintage-y.   I did a Google search for small pink rosebuds, but couldn't find exactly what I was looking for.

Then I remembered this scrapbook paper I got from Hobby Lobby.  It had the perfect size little roses. 


And I had this inkjet decal paper bought on Amazon.


 I placed the decal paper in my printer paper tray and copied the scrapbook paper onto the glossy side.

The ink on the decal paper is very wet when it comes out of the printer.  It would easily smudge if touched.  I set it aside for 30 minutes.  After it dried,  I gave it a light coat of Krylon Matte Finish Sealer. When that dried, I gave another light spray.    Since it was already evening when I was doing this, I gave it one more final spray of sealer before I went to bed and let it set overnight.  Three coats of sealer may be overkill, but I'd rather be safe then sorry.


The next morning I cut out several little roses with an Exacto knife.  It's important to cut as closely to your image as you can. 

I put a decal in a bowl of water for a few minutes until the papers separate.  Then I placed it on the wood and pressed gently with a soft, dry cloth.   When I was finished with the decals, I sprayed 2-3 coats of sealer on them to make sure they stay put.


A little Annie Sloan clear wax was applied everywhere, except the decal area.


And now when it's nap time,  Avenleys baby has her own special little place.


Monday, March 7, 2016

Wood picture frame for master bedroom

I'm still working on my master bedroom trying to lighten up my recently painted chocolate brown walls. I still need a rug, lamps and pictures, but it's slowly coming together.   Over the weekend, I bought some drapes from Ikea and a duvet cover from Pottery Barn.  The walls are pretty bare, so I need to get busy on my next little project,

This was another frame that I picked up from the thrift store.   


Using a hair dryer on low helps to soften the glue on the duct tape, so I could remove the chalkboard and excess tape.


 Once I got the sign out, I flipped it over to the other side, which was a much lighter color.  Since I was going to be using a dropcloth, I didn't want the black chalkboard color showing through the fabric,

I sprayed 2 light coats of  Heirloom White on the frame.  

Using the chalk board sign as a template, I cut out my dropcloth leaving a 1/2 inch on all sides.   Then I gently pulled it taut and hot glued all the way around.   Sorry, I have no picture of that, but I was needing both hands.

I wasn't sure yet what to put in the center of my frame.  But then I remembered I bought some assorted sizes muslin bags a few weeks ago.  One of the smaller sizes should work nicely.


I got out my rubber stamps picked this postmark image


And glued on a ribbon and cotton strip for a little interest 


Next, using fabric glue I placed the bag on the dropcloth.  I put a piece of cardboard inside the bag when I was doing this so the glue wouldn't leak through the front.


And added some silk flowers


Time for a hot cup of coffee and let everything dry.

When the sign went back in the frame, I noticed that the dropcloth made it very snug..   No other assembly was needed.  Yay!  

My walls are looking less naked these days :)